Spring Security RememberMeAuthenticationFilter
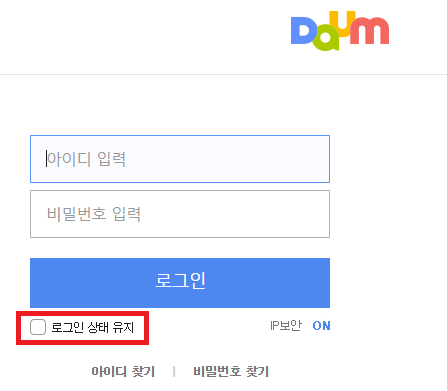
RememberMe 기능은 해당 사이트 로그인 시 세션 종료 및 브라우저 종료 하더라도 로그인 상태를 유지 할 수 있는 기능이다.
개요
일반적으로 로그인을 했다는 것은 해당 WAS 서버에 해당 사용자의 세션이 생성 되었고
Spring Security 가 인증 객체 통해 보관 하고 있다.
그럼 사용자는 다른 페이지에 접속해도 해당 세션을 request 시 함께 서버로 전달 하고
서버는 Spring Security 가 인증 객체 통해 보관 하고 있는 세션과 맞물려 있는지 체크 한다.
즉 인증 체크를 한다는 것 이다.
그러나 그 세션이 기한이 끝났거나 소멸될 경우 다시 로그인을 해야 하는데
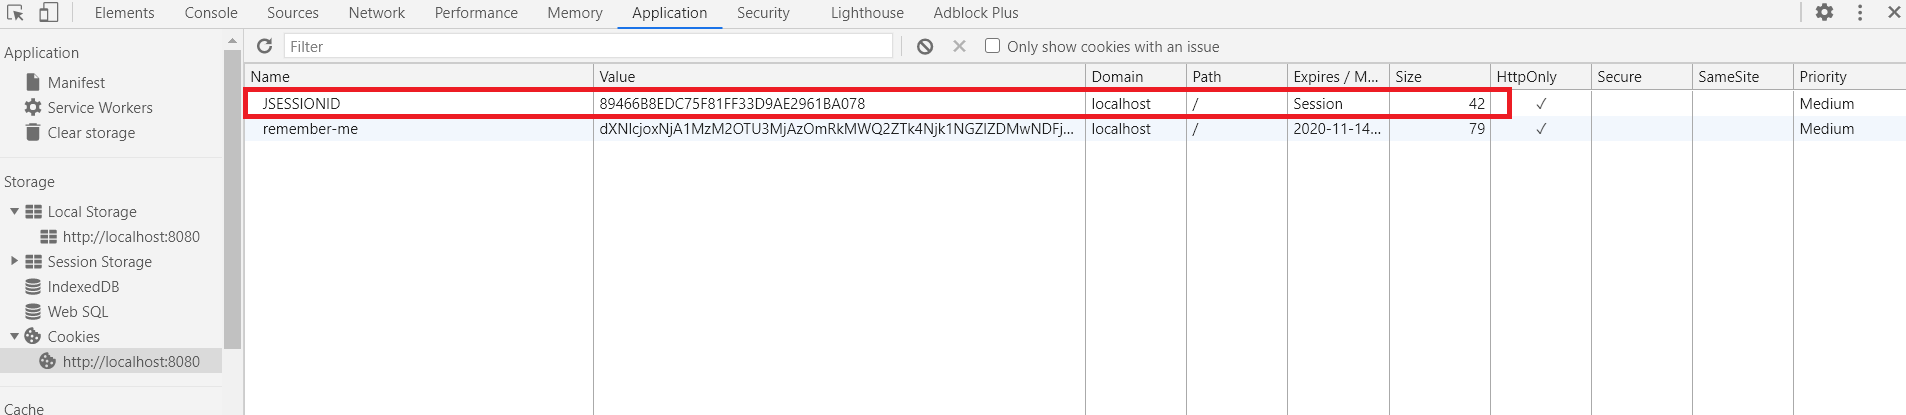
RememberMe 기능은 소멸된 세션이라 할지라도 remember-me 라는 또 다른 세션을 생성 후 클라이언트에 response 한다.

그럼 일반 세션을 변조 하거나 value 값을 삭제 할 경우

이렇게 일반 세션을 변조 하였다. 그럼 일반적으로 해당 세션값은 서버에 등록된 1234 값이 없기 때문에 인증 처리 되지 않아 다시 로그인 해야 한다.
하지만 새로고침 하면 remember-me 세션 토큰값 통해 Spring Security 에는 파싱 해서 아이디 및 비밀번호 다시 추출해
다시 인증 처리를 하게 된다.
여기까지 기본 정의를 설명 하였고 본격적으로 Spring Security 에서는 rememberMe 를 어떻게 처리 및 Flow 하는지
알아보겠다.
기본 Spring Security 설정
1
2
3
4
5
6
7
8
9
10
11
12
13
14
15
16
17
18
19
20
21
22
23
24
| @Configuration
@EnableWebSecurity
public class SecurityConfig extends WebSecurityConfigurerAdapter {
... 생략 ...
@Override
protected void configure(HttpSecurity http) throws Exception {
... 생략 ...
http
.rememberMe()
.rememberMeParameter("remember")
.tokenValiditySeconds(3600)
.userDetailsService(userDetailsService);
... 생략 ...
}
... 생략 ...
}
|
AbstractAuthenticationProcessingFilter -> successfulAuthentication
최종적으로 로그인 인증 처리가 완료 되면 다시 AbstractAuthenticationProcessingFilter 로 돌아 오게 되는데
successfulAuthentication 메소드를 호출 하게 된다.
1
2
3
4
5
6
7
8
9
| // AbstractAuthenticationProcessingFilter 클래스
protected void successfulAuthentication(HttpServletRequest request, HttpServletResponse response, FilterChain chain, Authentication authResult) throws IOException, ServletException {
.. 생략 ..
SecurityContextHolder.getContext().setAuthentication(authResult);
this.rememberMeServices.loginSuccess(request, response, authResult);
.. 생략 ..
}
|
rememberMeServices.loginSuccess 호출 해서 해당 remember-me Token 생성 한다.
1
2
3
4
5
6
7
8
| // AbstractRememberMeServices 클래스
public final void loginSuccess(HttpServletRequest request, HttpServletResponse response, Authentication successfulAuthentication) {
if (!this.rememberMeRequested(request, this.parameter)) {
this.logger.debug("Remember-me login not requested.");
} else {
this.onLoginSuccess(request, response, successfulAuthentication);
}
}
|
onLoginSuccess 메소드를 호출 해서
1
2
3
4
5
6
7
8
9
10
11
12
13
14
15
16
17
18
19
20
21
22
23
24
25
| // AbstractRememberMeServices 구현체인 TokenBasedRememberMeServices 클래스
public void onLoginSuccess(HttpServletRequest request, HttpServletResponse response, Authentication successfulAuthentication) {
String username = this.retrieveUserName(successfulAuthentication);
String password = this.retrievePassword(successfulAuthentication);
if (!StringUtils.hasLength(username)) {
this.logger.debug("Unable to retrieve username");
} else {
if (!StringUtils.hasLength(password)) {
UserDetails user = this.getUserDetailsService().loadUserByUsername(username);
password = user.getPassword();
if (!StringUtils.hasLength(password)) {
this.logger.debug("Unable to obtain password for user: " + username);
return;
}
}
int tokenLifetime = this.calculateLoginLifetime(request, successfulAuthentication);
long expiryTime = System.currentTimeMillis();
expiryTime += 1000L * (long)(tokenLifetime < 0 ? 1209600 : tokenLifetime);
String signatureValue = this.makeTokenSignature(expiryTime, username, password);
this.setCookie(new String[]{username, Long.toString(expiryTime), signatureValue}, tokenLifetime, request, response);
... 생략 ...
}
}
|
remember-me token 생성하는 로직이다.
아이디 패스워드 만료시간 등 조합해서 setCookie 하게 되고 response 시 생성한 token 을 클라이언트에게 전달 하게 된다.
RememberMeAuthenticationFilter
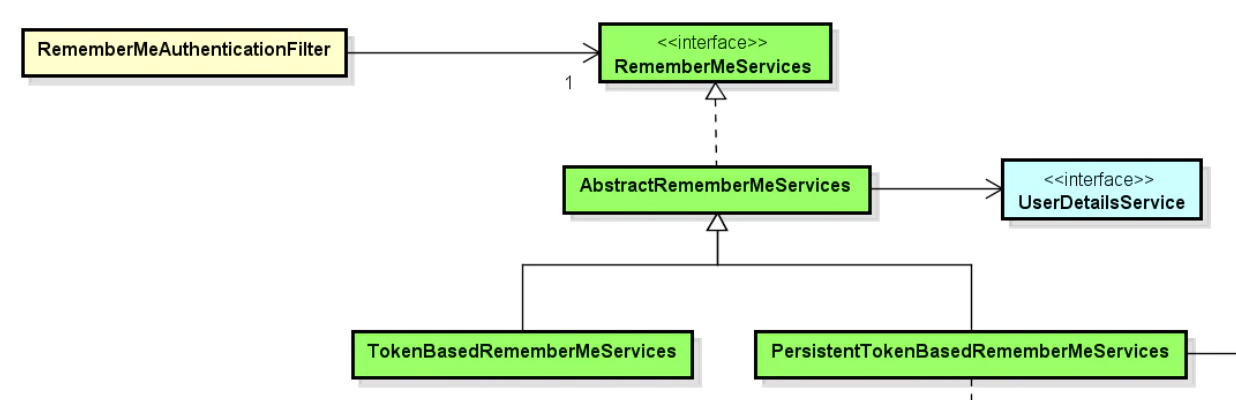
Spring Security 에서는 RememberMeAuthenticationFilter 이 객체에 전달하기 위해
조건이 있다. 우선 인증된 세션이 서버에 찾지 못 하거나 기간이 만료되거나 NULL 경우
그리고 클라이언트가 request 시 remember-me 쿠키 토큰값을 가지고 오는 경우
RememberMeAuthenticationFilter 객체가 발동 한다.
클라이언트 측에서 세션값을 제거 하거나 조작하고 다시 해당 페이지 새로고침 해보자!
1
2
3
4
5
6
7
8
9
10
11
12
13
14
15
16
17
18
19
20
21
22
23
| // RememberMeAuthenticationFilter 클래스
public void doFilter(ServletRequest req, ServletResponse res, FilterChain chain) throws IOException, ServletException {
HttpServletRequest request = (HttpServletRequest)req;
HttpServletResponse response = (HttpServletResponse)res;
// SecurityContext 에 있는 인증 객체가 Null 일때 rememberMe Flow 하게 된다.
if (SecurityContextHolder.getContext().getAuthentication() == null) {
Authentication rememberMeAuth = this.rememberMeServices.autoLogin(request, response);
if (rememberMeAuth != null) {
try {
rememberMeAuth = this.authenticationManager.authenticate(rememberMeAuth);
SecurityContextHolder.getContext().setAuthentication(rememberMeAuth);
this.onSuccessfulAuthentication(request, response, rememberMeAuth);
.. 생략 ..
}
chain.doFilter(request, response);
} else {
.. 생략 ..
}
}
|
this.rememberMeServices.autoLogin(request, response);
기존 세션값이 null 이기 때문에 remember-me token 을 이용해 다시 인증 처리 하게 한다.
1
2
3
4
5
6
7
8
9
10
11
12
13
14
15
16
| // AbstractRememberMeServices 클래스
public final Authentication autoLogin(HttpServletRequest request, HttpServletResponse response) {
// 발급 받는 remember-me token 값이 있는 확인 한다.
String rememberMeCookie = this.extractRememberMeCookie(request);
if (rememberMeCookie == null) {
return null;
} else {
... 생략 ...
return this.createSuccessfulAuthentication(request, user);
... 생략 ...
}
}
}
|
return this.createSuccessfulAuthentication(request, user);
인증 객체 생성 메소스 호출 한다.
1
2
3
4
5
6
| // AbstractRememberMeServices 클래스
protected Authentication createSuccessfulAuthentication(HttpServletRequest request, UserDetails user) {
RememberMeAuthenticationToken auth = new RememberMeAuthenticationToken(this.key, user, this.authoritiesMapper.mapAuthorities(user.getAuthorities()));
auth.setDetails(this.authenticationDetailsSource.buildDetails(request));
return auth;
}
|
여기서 인증 객체를 생성 후 RememberMeAuthenticationFilter 클래스 doFilter 메소드에 반환 해서
1
2
| // RememberMeAuthenticationFilter > doFilter
rememberMeAuth = this.authenticationManager.authenticate(rememberMeAuth);
|
authenticationManager 호출해서 다시 authenticationProvider 인증 처리 위임해 평상시대로 인증 처리를 하게 된다.
1
2
| // RememberMeAuthenticationFilter > doFilter
SecurityContextHolder.getContext().setAuthentication(rememberMeAuth);
|
이상으로 인증이 성공적으로 처리 되었다면 SecurityContext 에 해당 사용자 인증 객체에 저장 하게 된다.
Copyright 201- syh8088. 무단 전재 및 재배포 금지. 출처 표기 시 인용 가능.

